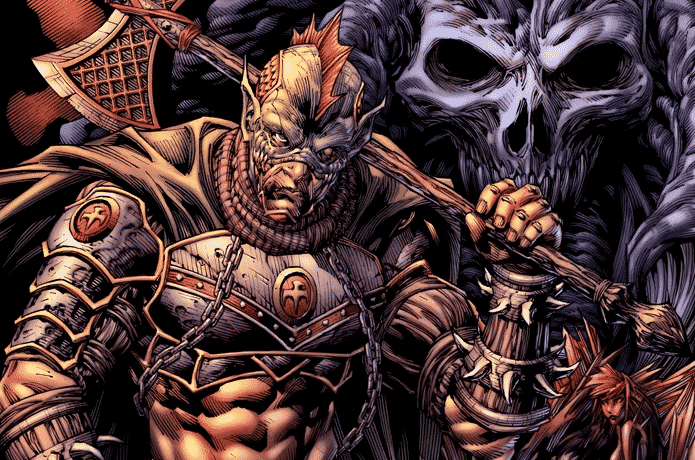
In today’s drawing demonstration I’ll reveal my process for sketching the cover of “KOZOR: Descent into Madness”.
Find out more about “KOZOR: Descent Into Madness” here: https://www.indiegogo.com/projects/–126368/coming_soon/x/20658139
“KOZOR: Descent Into Madness” is a comic book project my brother Korey and I are currently working on. The book itself is done and ready to go, but before we take it to print, we wanted to give it a bit of a face lift – remastering the art, editing the dialogue and creating a special edition cover for the definitive version.
The video you’re about to watch will give you an inside look into the making of this new cover. Specifically, you’ll see how the drafting phase of the process unfolds, as I loosely sketch in the characters and backgrounds elements to compose a cohesive scene from front to back.
In these early stages of development, my focus isn’t on the details, but rather the broader scope of everything that will ultimately be featured on the cover.
I want to know where each of the key elements will be placed, how large they will be, and how they’ll relate to one another. I’ve also got to decide where I want the viewers’ attention to be drawn to first, and ensure that everything included in the composition leads their eye to that point.
It’s all very rough and loose in the beginning. Mistakes will be made, and the drawing will be constantly adjusted to fit the evolving concept. Our aim first and foremost is to come up with a loose blue print that can later be defined, and ultimately rendered as the finished line art.
The fun starts here. We’re able to let our creative mind roam free, our ideas pour out onto the page. The challenge is arranging them into something that we can work with.
I hope you enjoy this video and get a ton of value out of it. See if you’re able to apply some of the methods and techniques I’ve shared with you throughout today’s demonstration – and remember to practice them over and over again. This is the best way to build upon your skill set.
PLEASE NOTE: This tutorial may not always be available for free. There’s a good chance it’ll be taken down, re-edited and packaged up as a premium product later on. So if you find this lesson valuable, please make the most of it while it’s available for free, by taking notes and putting as much of it as you can into practice. Save the video onto your hard drive as well if you’d like, so that you can refer back to it later on.
Until next time, keep on drawing.
-Clayton
Software Used: Clip Studio Paint/Manga Studio
If you like the video, show your support by commenting, sharing or subscribing.
Comic Art Community – https://www.howtodrawcomics.net/comic-art-community/
How to Draw Comics .NET – http://www.howtodrawcomics.net/
Instagram – https://www.instagram.com/howtodrawcomics/
Facebook – https://www.facebook.com/howtodrawcomics
Twitter – https://twitter.com/howtodrawcomics
Tumblr – http://howtodrawcomics.tumblr.com/
Pinterest – http://www.pinterest.com/howtodrawcomics/